
You have no items in your shopping cart
Tissue Homogenizer Guide
- Posted on
- Posted in Homogenizer
- 0
Intro to Tissue Homogenization

Any facility that needs to prep tissue samples for analysis will need one of several types of homogenizers for their sample preparation. Using the proper homogenizer, which we will go over soon, is key to breaking down tissue for cell lysis, protein extraction, dna extraction, and more. The force of a homogenization process will break down the outer cell wall and release all of the needed proteins trapped inside the cell for rna extraction, nucleic acids, etc. Once all of the required material has been released from the cell, the sample is ready for testing.
There are two main types of homogenizers for shredding tissue. A bead mill homogenizer uses vibration to push a sample through specialized beads. With the help of high rpm agitation, the beads bounce against the sample thus breaking them down. These types of homogenizers are useful but require regular purchase of specialized equipment such as the beads and plastic tubes for the homogenization process.
The main point of this article will be to discuss high shear, rotor stator homogenizers for tissue breakdown. A stainless steel shaft consisting of a high rpm rotating blade called a rotor coupled with a high tolerance stator that acts as a housing around the rotor has a gap of only a few millimeters between the spinning blade and stationary stainless steel walls. As the rotor spins at over 10,000 rpms, solids are sucked in between the rotor and the stator and sheared between the tight space in order to break down molecules and reduce their size, in this case to open up cell walls and release the inner protein.
These rotor stator homogenizers have a wide range of use since the end of the shafts are submerged into a vessel, rather than pushing a small sample through a bead mill chamber.
Some lab applications suitable for a rotor stator homogenizer are:
-Plant tissues
-Animal Tissues
-Grinding Bone
-Forensics
-Microbiology
-Pharmacology
What You Need to Get Started
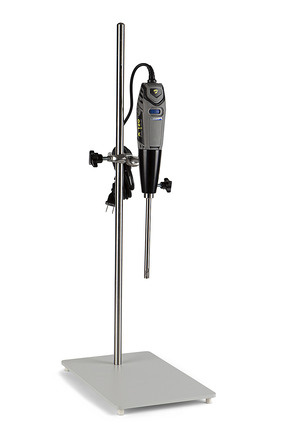
To begin processing samples in the lab with a high shear homogenizer, start by choosing a driver. A driver is the powered part of the homogenizer that spins the shaft and ultimately determines how much solution can be processed at once. For a tissue homogenizer, usually a smaller driver is enough since sample sizes are minimal. A smaller driver can be handheld and does not require a motor stand like larger units. For example, our smallest homogenizer is an X120. This is a portable device that is ideal for sample sizes common in tissue homogenization.
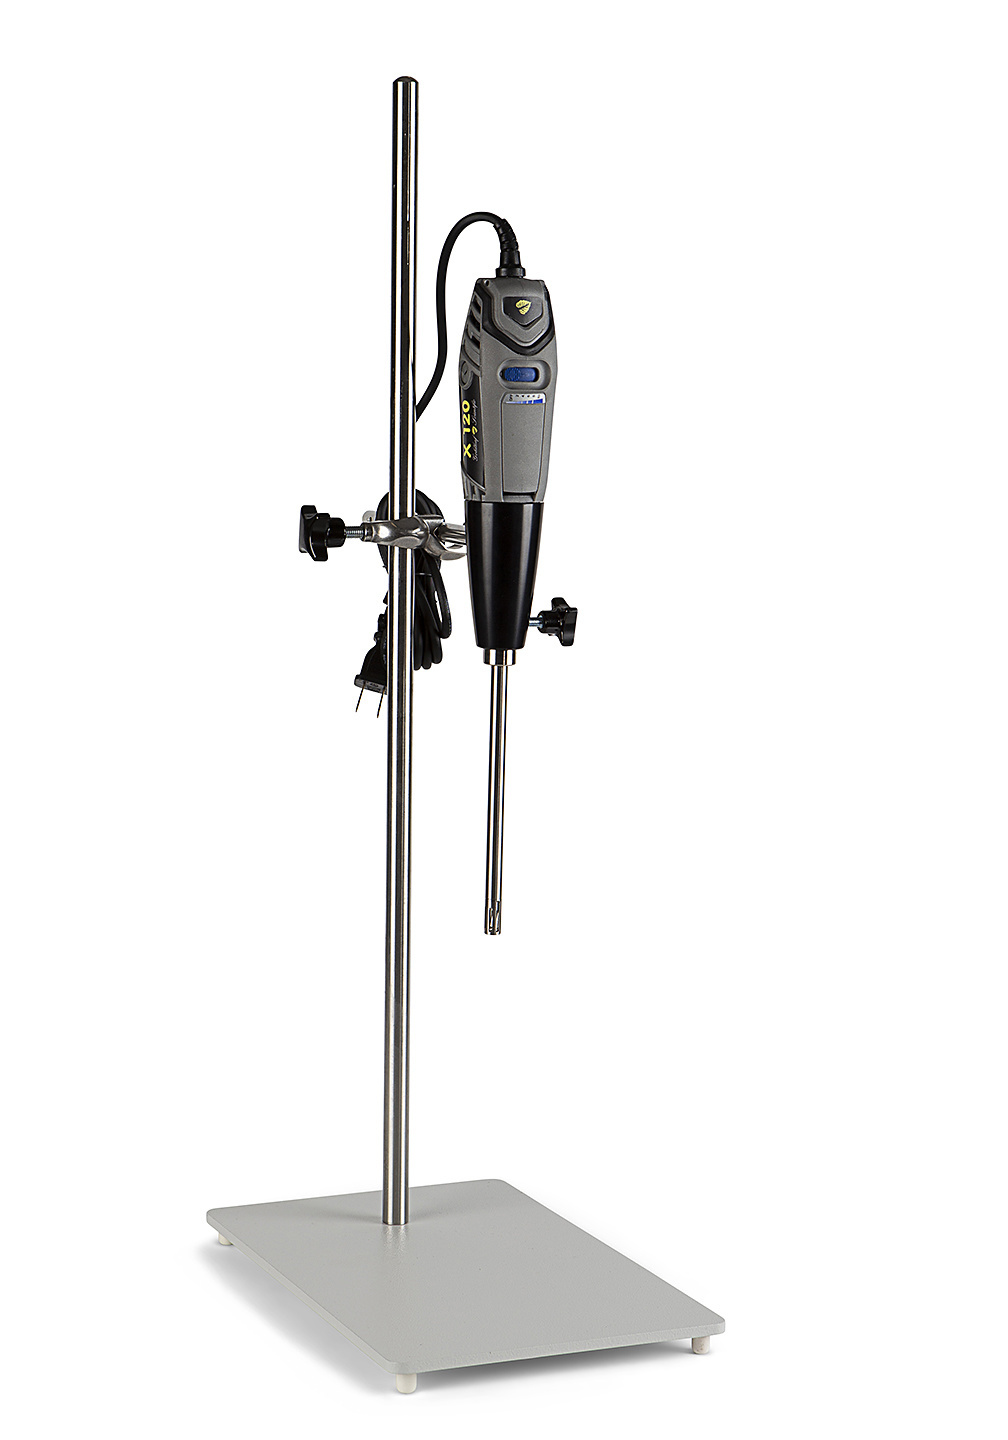
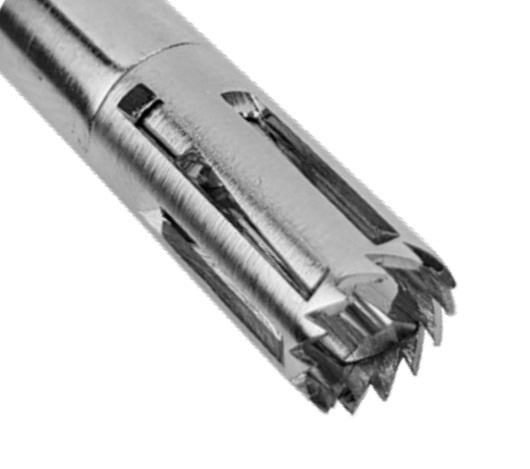
The driver selected will entirely determine the shafts that can be used. With an X120 Homogenizer, the smaller shafts available are a T6 and T10 Shaft (see the shaft selection guide below). A tissue homogenizer shaft will require a blade type stator, also known as a knife or solids shaft. This rotor will have a sharp, toother blade specifically designed for breaking down tissue.
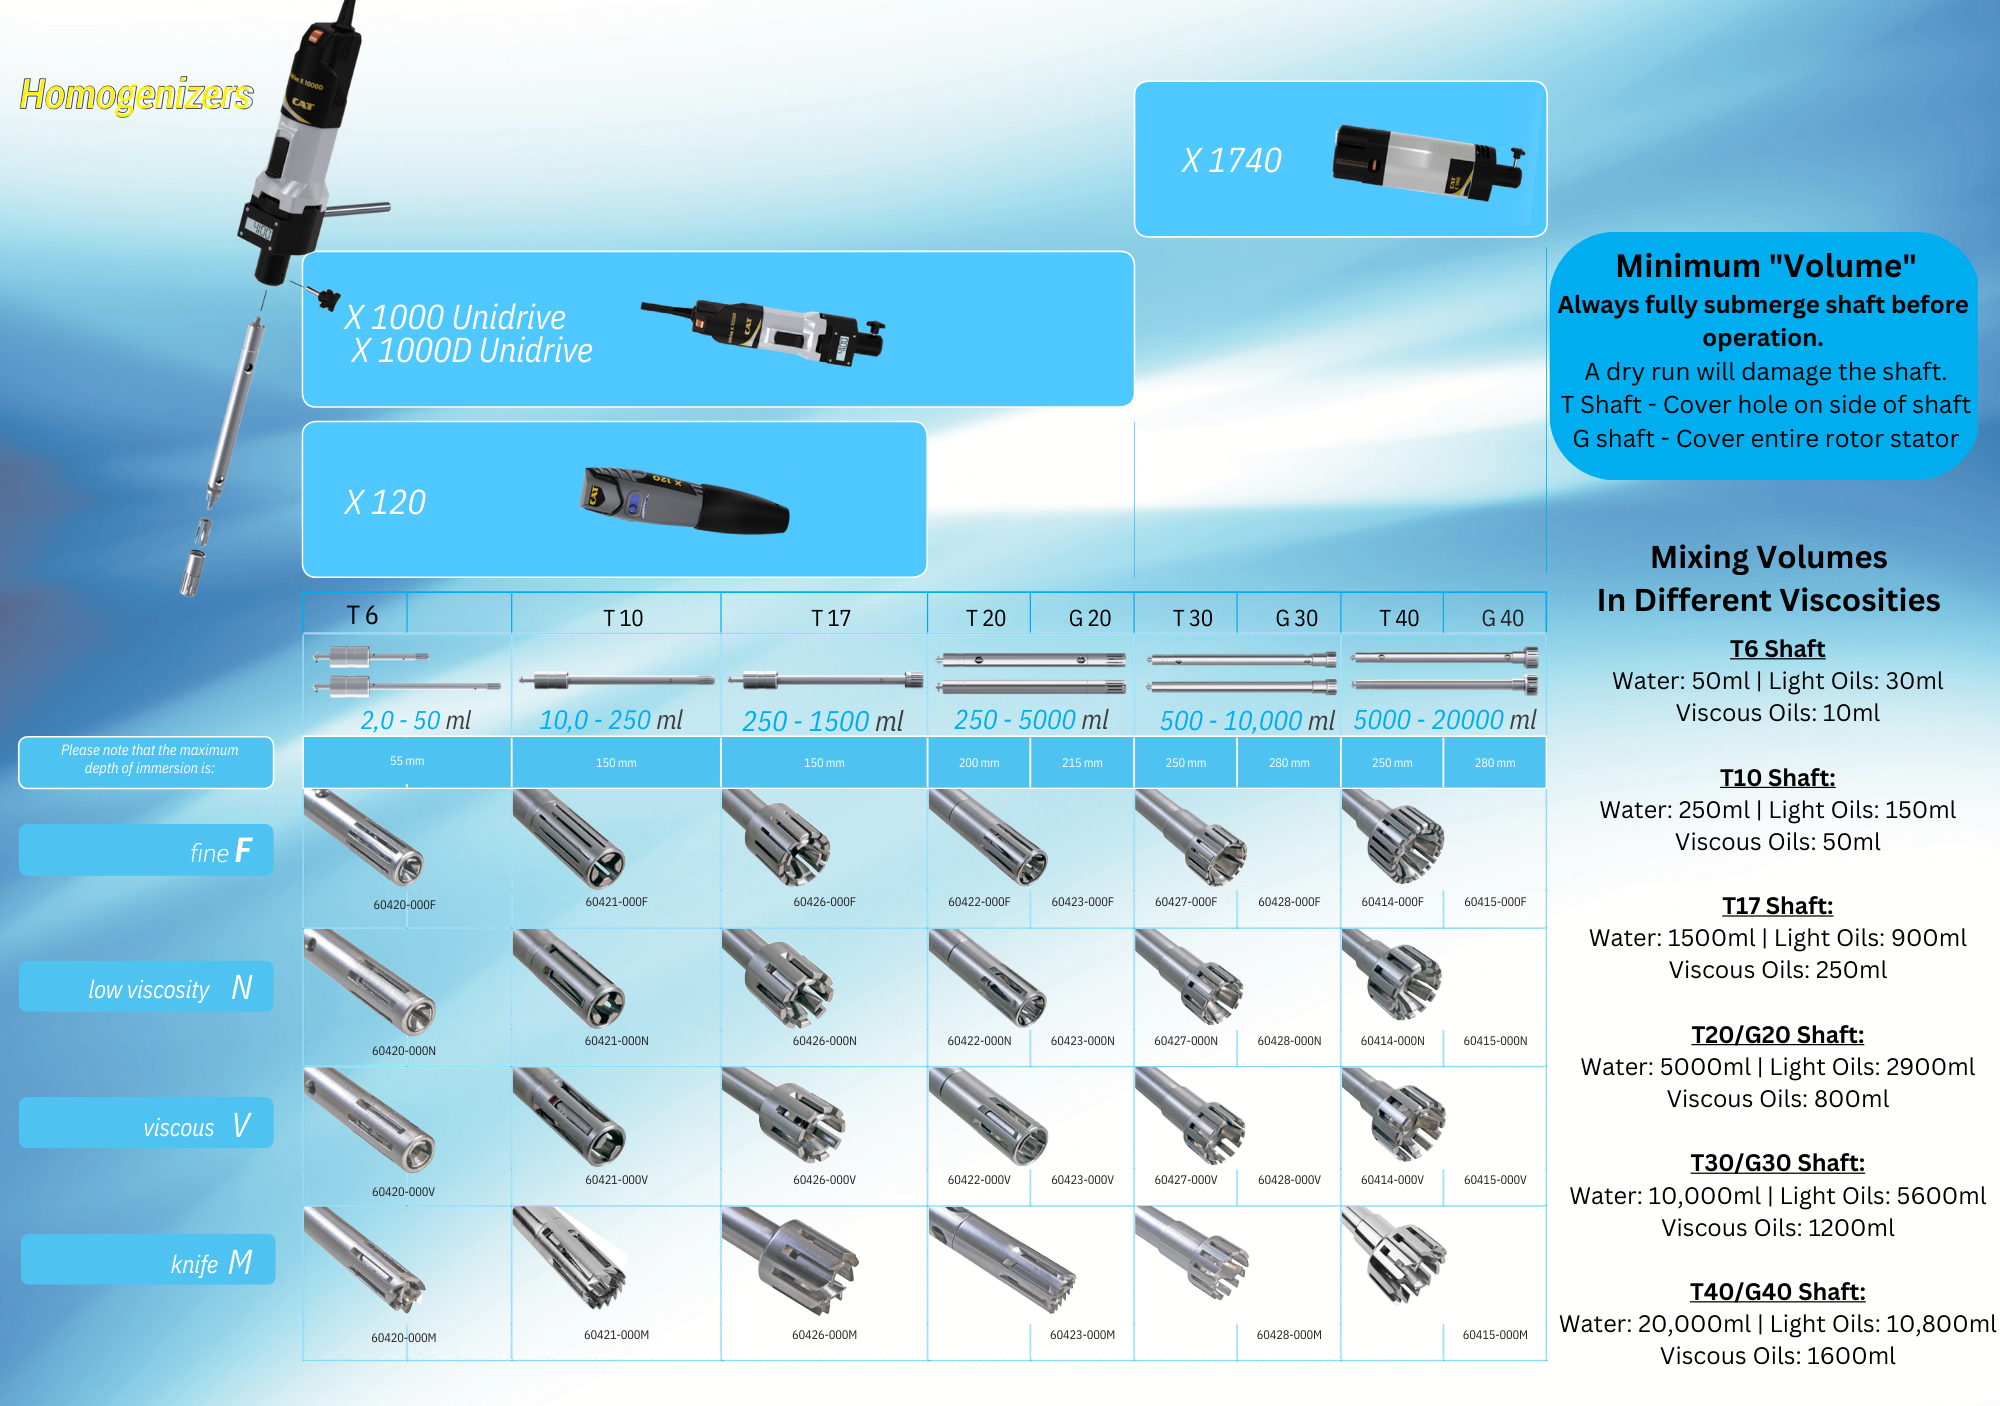
Once the driver and shaft is sorted out, a mixing container is needed to properly house the sample. For larger samples, a tall form beaker is ideal as it is a narrower vessel that can properly submerge the shaft into the solution. Smaller samples require a vial or tube that can fit the homogenizer shaft. Certain tubes may require a bit more liquid in order to completely cover the X120 shaft as needed, since every shaft has a minimum sample volume needed to completely cover the rotor and stator.
When dealing with heat sensitive samples, it is sometime necessary to use ice or a cold water bath to submerge the sample. Doing so will prevent heat degradation brought on from the friction of the homogenizer. However, using a high shear homogenizer only takes about 30-60 seconds at most, and the homogenizer can be ran in short bursts which prevents thermo sensitive samples from over heating.
Prepare Samples
Sample preparation is a key aspect when breaking down tissues. If a sample is not properly prepared, it will not break down when being homogenized, and testing will not be accurate afterwards. Sample type is important and should consist of soft tissue, as hard tissues that are more fibrous can clog a homogenizer and will also not break down properly. Larger pieces of tissue should be cut to size using a scalpel, if a sample is too large, it will not fit between the rotor and stator to be broken down.
How to Use
Once the sample preparation is complete and the homogenizer setup assembled, the homogenization process is fairly quick. Insert the end of the shaft into the solution and turn on the motor to begin homogenizing, the homogenizer can be turned on and off to run in short bursts if heat is an issue. Let the homogenizer run for a total of 30 to 60 seconds. The process is compete when the sample is visibly broken down and the solution is mixed nicely. When samples are prepped in succession to save time and a quick cleaning process is implemented, processing throughput can be very efficient.
Maintenance
After a sample is homogenized, keeping the shaft operational is the next focus. Cleaning the shaft is important to prevent cross contamination. In between samples, the unit can be ran briefly in a container of water or a cleaning solution such as alcohol to remove residuals from the shaft. Ideally, using a new shaft for different samples would completely eliminate cross contamination, but shafts can be very expensive so consider costs when planning.
Every homogenizer kit comes with specialty tools to break apart the shaft. Removing the rotor and stator, disassembling the shaft, and cleaning the internals needs to be done at the end of each day. Leaving any solution on or in the shaft will dry and clog the shaft and damage the delicate internals. Since this shaft can spin upwards of 30,000 rpms, making sure there are no obstructions is vital to the longevity of a homogenizer.
Even with daily cleaning, ware and tare will eventually eat up internal parts such as gaskets and rings. This means that small parts will need to get replaced at some point. When the replacement is needed depends on how well the homogenizer is maintained. These parts can last anywhere from 6 months to 2 years if properly cleaned. The driver or motor will last forever, as long as it was not ran with a clogged shaft that blocked the motor from spinning. The only time a driver goes out is when a shaft is not working and users try to turn the driver up to force the shaft to spin, which will only damage the motor. Each unit bough from Goldleaf comes with a 1 year warranty for manufacturer defects. For problems from user error, we do offer in house repairs and replacement parts as needed.
Conclusion
There are multiple types of homogenizers for tissue samples and choosing the right one for your needs will have a huge impact on your processing abilities. Smaller rotor stator homogenizers do not require regular purchase of consumable items and have a wide range of use. As long as they are regularly maintained, they will last a very long time with little recurring cost.
If you are unsure what homogenizer is best for your application, call or email and we can walk you through the setup.
![]()
Comments
Be the first to comment...